Say you have an open source Python project or package you are maintaining. You probably want to test it on the major Python versions that are currently in wide use. You definitely should. In some cases you might also need to test it on different operating systems. I’ll discuss both scenarios, and suggest a way to do just that, in this post.
Not a Travis CI user yet? Sign up today!
For the sake of this post I’m going to assume you are:
pytest to test your code.Just because it’s a nice simple flow to follow, and it’s the one that I use. The method presented here, however, can be easily adapted to other flows.
The post below walks you through the stages and rational for the structure of the resulting .travis.yml file, which covers testing on different Python versions and operating systems thoroughly. If you’re not interested in all that, you can just take a look at the final result in a GitHub gist I created for it.
A great way to test your code on several Python versions is to use the Travis CI service, which offers (among other features) cloud-based, continuous testing, free for open source (i.e. public) GitHub projects. Let me briefly introduce you to basic Python testing with Travis CI.
To use Travis CI simply follow these three steps:
.travis.yml file in the root of your repository; this file will tell Travis how this specific project should be built and tested..travis.yml filesSo let’s say you have a small Python package, with a simple setup.py file. And you have the following very basic .travis.yml that runs your tests through several Python versions:
language: python
python:
  - 2.7
  - 3.5
  - 3.6
before_install:
  - python --version
  - pip install -U pip
  - pip install -U pytest
  - pip install codecov
install:
  - pip install ".[test]" . # install package + test dependencies
script: pytest # run tests
after_success:
  - codecov # submit coverage
Let’s go over each part of the above file:
python --version to see the exact Python version I’m running.(2) pip install -U pip because you always have to work with the most updated pip. Some builds will fail without this (e.g. Python 2.7, for me).(3) pip install -U pytest — I have settled on always doing this, as this again saves me from failures. For some of my current projects, Python 3.6 will fail if I only pip install pytest without the -U to update.(4) pip install codecov — Since I only use this on Travis, and not locally, this is not part of the extra [test] dependencies of my package.pip install “this” folder (so . ) with the optional test dependencies. Test dependencies for my package are usually pytest, coverage and pytest-cov that integrates the two.pytest. I’m assuming that you detail all the nice CLI arguments for pytest in a pytest.ini file. This will help keep the .travis.yml file cleaner when we start adding stuff. Here’s an example for pytest.ini: [pytest]
testpaths =
tests
skift
norecursedirs=dist build .tox scripts
addopts =
--doctest-modules
--cov=skift
-r a
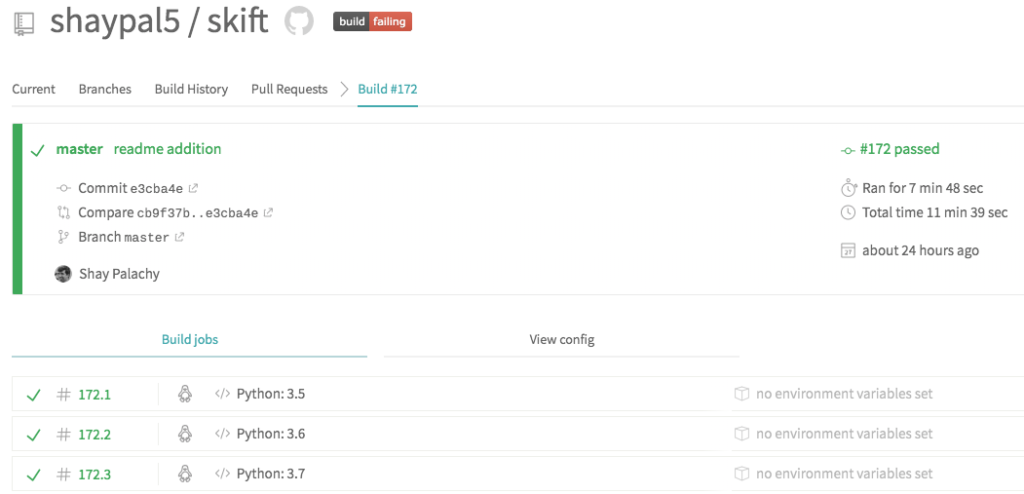
-vpytest run and post it there. If you want coverage results for any build — failed or successful — just make this line the second item of the script entry.With this configuration, every commit to your repository will trigger a nice build for the corresponding project on Travis CI,with each build being composed of one job per Python version (all on Linux machines), like so:

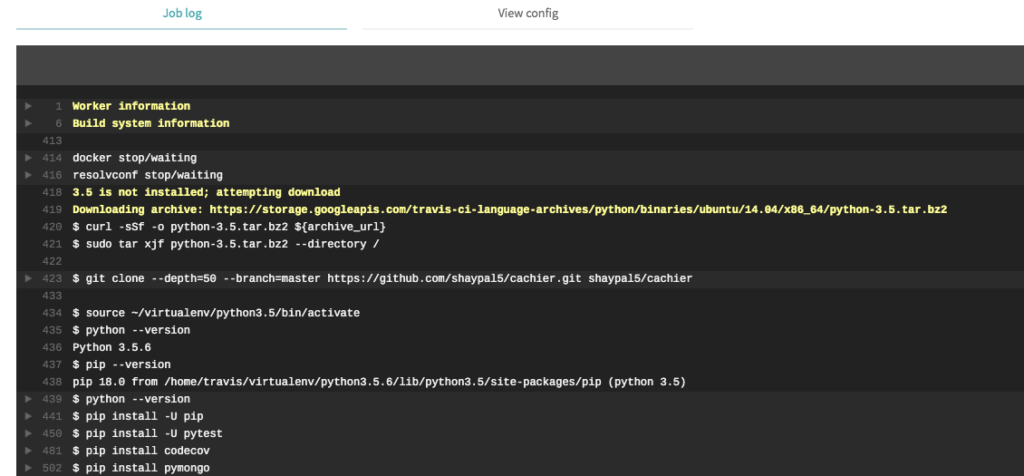
You can also go into the log of each job and see the results of each command — either live or post factum:

Another way to test your Python code on several Python versions is to use tox, a powerful tool for automation and standardization of Python tests. I’m advocating for the above method because its one job == one Python version approach means builds finish faster (as up to three jobs run in parallel on Travis), and that you can immediately understand which version is giving you trouble without diving into the log. That’s just my personal preference, of course.
The first complication in multi-version Python testing arises when we try to use Python versions that may not all be available on the same Ubuntu distribution. For example Ubuntu 14.04, dist: trusty, doesn’t support Python 3.7.
To ensure compatibility, even if you’re running Linux builds on the current default, it’s better to pin the Ubuntu distribution that works for your project. In this case, we’ll pin it to Ubuntu 16.04 (nicknamed xenial), which is the current Travis CI default for Linux builds.
You can explicitly use Ubuntu 16.04 which supports all the Python versions we want, by adding a dist: xenial entry to your .travis.yml file.
But what if you prefer testing lower versions on Ubuntu 14.04, and use xenial only for Python 3.7?
While it’s probably a negligible corner case, it will allow me to introduce Travis build matrices in a gradual manner, and these will prove to be crucial later on, so just go with me here.
There are two ways to specify multiple parallel jobs in Travis. The first is to provide multiple options to more than one entry effecting the build environment; a build matrix of all possible combinations is automatically created and ran. For example, the following configuration produces a build matrix that expands to 4 individual (2 * 2 ) jobs:
language: python
python:
  - 2.7
  - 3.5
env:
  - PARALLELIZE=true
  - PARALLELIZE=false
The second is to specify the exact combination of configurations you want in matrix.include. Continuing the above example, if parallelization is not available for Python 2.7, you might prefer specifying three specific jobs:
language: python
matrix:
  include:
  - python: 2.7
    PARALLELIZE=false
  - python: 3.5
    PARALLELIZE=false
  - python: 3.5
    PARALLELIZE=true
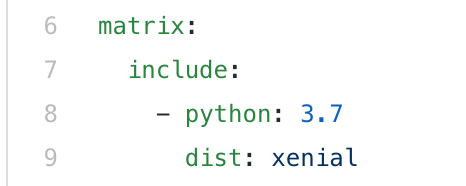
Or, in our case, to run a Python 3.7 job on xenial, add a single job entry:

Cool. So we saw two ways to test Python 3.7 — the special snowflake of Pythons— on Travis, and got to know Travis build matrices a little bit. Let’s move on.
So, you’re testing your simple pure-Python package on every important major version of Python. You’re a responsible open-source contributor. Yay for you.
But what if your Python project is not a pure-blood, but a muggle containing some specialized C++ code? Or maybe your code is pure-Python, but it interacts with the operating system (e.g. writing files, juggling threads or processes, etc.) in a non-trivial way, that can differ between operating systems?
If that’s the case, you definitely should test your code (and possibly also build it) on all three major OS, if you want your project to support them.
For myself, the need arose on two projects, both pure Python:
fcntl) broke the first time a Windows user tried to use my package.The solution I’ve settled on was expanding the Travis build matrix to include specific combinations of operating systems and major Python versions, each to be run in it’s own job, on a totally separate environment.
Again, when comparing this approach to using tox, I’ll say the main advantages are:

Hopefully I’ve convinced you this is a valid approach to multi-OS testing, so we can move to the specifics. We’ll start with testing on macOS and finish with Windows.
At the time of writing, Python builds are not available on the macOS environment. This doesn’t mean it’s impossible to test Python on macOS with Travis, just that the following naive approach won’t work:
matrix:
  include:
    - name: "Generic Python 3.5 on macOS"
      os: osx
      language: shell  # 'language: python' is an error on Travis CI macOS
      python: 3.5
Whatever the version number you assign to the python key, you’ll get a macOS machine with Python 3.6.5 installed. This is because asking for a machine with os: osx spins up a machine using the default Xcode image, which is currently Xcode 9.4.1 for Travis.
The current hack-ish way to get a macOS machine with a specific Python version is to ask for a specific Xcode image, using the osx_image tag, which you know comes preinstalled with the Python version you want to use.
For example, to get a machine with Python 3.7 you can add the entry of osx_image: xcode10.2 (you’ll get Python 3.7.3, specifically). Cool. So how do you know which Xcode image comes with which Python version? Unfortunately, this mapping is not listed anywhere on Travis’ website or documentation.
Luckily for you, however, I did the dirty work and dug this information up. This basically entailed actively searching the Travis blog for posts on Xcode images releases to hunt down the Python versions on each image. The latest releases of major Python versions I have found are:
xcode9.3 — Comes pre-installed with Python 2.7.14_2xcode9.4 — Comes pre-installed with Python 3.6.5xcode10.2 — Comes pre-installed with Python 3.7.3Unfortunately, I haven’t found a Travis Xcode image to come preinstalled with Python 3.5 (let me know if you do!).
So you got the right Xcode tag. You still, however, need to adapt some of the build commands. For Python 3 versions, for example, we need to explicitly call pip3 and python3 to install and call (respectively) Python 3 code, since macOS comes preinstalled with Python 2 (which is what the python command points to):
matrix:
  include:
    - name: "Python 3.6.5 on macOS 10.13"
      os: osx
      osx_image: xcode9.4  # Python 3.6.5 running on macOS 10.13
      language: shell  # 'language: python' is an error on Travis CI macOS
      before_install:
        - python3 --version
        - pip3 install -U pip
        - pip3 install -U pytest
        - pip3 install codecov
      script: python3 -m pytest
      after_success: python 3 -m codecov
Considering this, you would have thought that a Python 2 job would require less custom entries. Unfortunately, because we’re using the OS Python, pip installation commands need to be appended with the --user flags for Python 2. Moreover, as a result their CLI commands won’t be installed, so we’ll again have to call their commands through the python command:
matrix:
  include:
    - name: "Python 2.7.14 on macOS 10.13"
      os: osx
      osx_image: xcode9.3  # Python 2.7.14_2 running on macOS 10.13
      language: shell  # 'language: python' errors on Travis CI macOS
      before_install:
        - python --version
        - pip install pytest --user
        - pip install codecov --user
      install: pip install ".[test]" --user
      script: python -m pytest  # pytest command won't be found
      after_success: python  -m codecov  # codecov command won't be found
Good, we’re done with testing Python on macOS. Have a cookie.

Travis support for Windows builds is in an early access stage. Currently, only Windows Server (version 1803) is supported. This doesn’t come with Python, but does come with Chocolatey, a package manager for Windows, which we’re going to use to install Python.
Since we are using Chocolatey to install Python, we are limited to the versions available through it. For Python 3, these are 3.5.4, 3.6.8 and 3.7.4. For Python 2, version 2.7.16 is currently the one installed by default.
Here’s a simple variation of a job entry to get a Windows-Python job, which includes the Chocolatey install command choco and an environment variable setup:
matrix:
  include:
    - name: "Python 3.5.4 on Windows"
      os: windows           # Windows 10.0.17134 N/A Build 17134
      language: shell       # 'language: python' is an error on Travis CI Windows
      before_install:
        - choco install python --version 3.5.4
        - python --version
        - python -m pip install --upgrade pip
        - pip3 install --upgrade pytest
        - pip3 install codecov
      env: PATH=/c/Python35:/c/Python35/Scripts:$PATH
As you can see, the generic script and after_success phases work just fine. You can take a look at the final file to see the slight variation required for each version, including Python 2.7.
We have covered by now almost each and every combination of common operating system and important Python version. Combining the bits and pieces we looked at above, we can come up with a not-so-short .travis.yml file that provides comprehensive testing for Python projects, which you can find in a Github gist I’ve created.
I do, however, want to add a few final notes before I end this post.
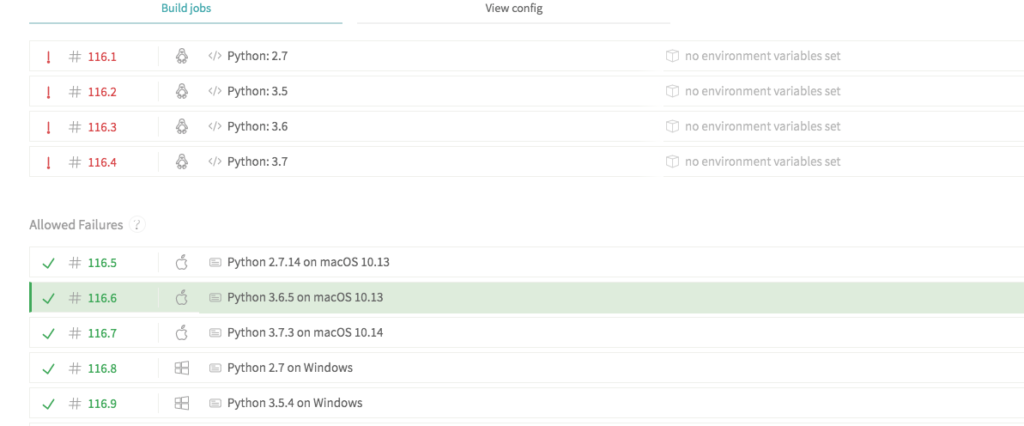
In some cases you might want to test your code continuously on specific OS-Version combinations that you expect to fail, like when certain tests fail on Windows but you are gearing towards adding Windows support in the near future. In that case, it is better to not have the entire build fail because of such jobs, so you don’t get annoying build failure notifications (and also because you can then show off a nice and shiny “build: passing” badge on your repo).

You can achieve this by adding an allow_failures entry under the matrix entry, detailing key-value pairs for which jobs are allowed to fail. For example, to have Python 3.7 on macOS allowed to fail, use:
matrix:
  - allow_failures:
      - os: osx
        osx_image: xcode 10.2
Setting - os: windows will allow all Windows builds to fail.
Additionally, if you’re already using the allow_failures logic, you might want to take advantage of the fast_finish capability. Setting fast_finish: true will determine the overall build status — pass or fail — as soon as all jobs which are not allowed to fail are done, while the rest of the jobs keep running. This is usually not crucial in small open-source projects, but it’s nice to have, especially if jobs on some exotic OS or Python version are allowed to fail and take a lot of time.
You can test your code against the development branches of different Python versions by adding the respective entry, like 3.7-dev under the python key. An important development branch to test against might be 3.8-dev, to prepare for what’s to come. You probably also want to allow all jobs using development branches to fail.
The solution I’ve presented puts most of the special code for macOS and Windows builds in the build matrix.
However, if you have some installation or testing code that is specific to Python version but should be run across all OS, you can condition commands on the value of the respective Travis’ environment variable:
if [ "$TRAVIS_PYTHON_VERSION" == "2.7" ]; then pip install . ancient_testing_packge; else pip install ".[test]"; fi
To do same thing across all jobs for the same OS, use:
if ["$TRAVIS_OS_NAME" == "linux"]; then pip install . special_linux_packge; else pip install ".[test]"; fi
Of course, if that is the case, you should probably consider handling this more cleanly in your setup.py file, by building the extras_require for test dynamically, based on Python version or OS (inferring it using Python code).
Thank you for reading through this post. I hope you have found it useful. 🙂
Again, you can take a look at the full resulting .travis.yml file in a dedicated Github gist.
Shay Palachy is a data science consultant and a co-founder of the DataHack non-profit.
Not a Travis CI user yet? Sign up for an account today!!
Looking for something more bespoke for your builds? Try a free trial of Travis CI.